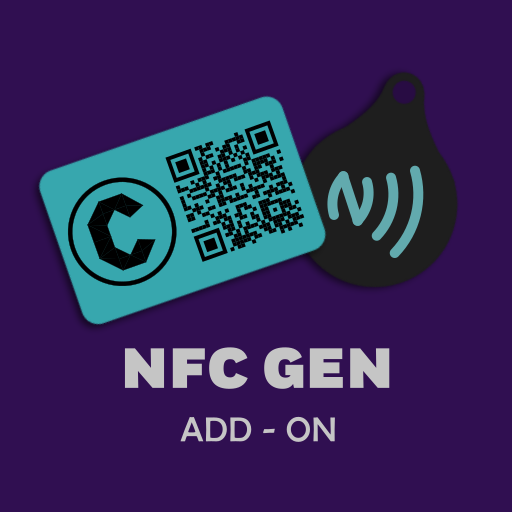
Card/Keychain w/ Custom Design and QR Generation and opt. NFC Cavity for 3D Printing
This add-on lets you design 3D-printable housings for NFC chips. You can add your own logos or icons (Wi-Fi symbol, social media logo, etc.), or use the built-in QR generator to put a backup code directly on the surface of the print.
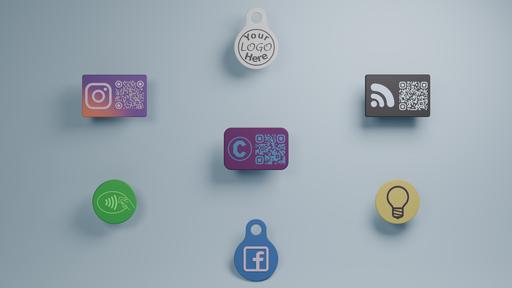
NFC chips and QR codes are powerful tools – they can share your socials or contact card, let guests tap to join your Wi-Fi, or even trigger automations with a single scan. However on their own, NFC chips don’t look great, and a paper QR code isn’t much better.
This add-on lets you design 3D-printable housings for NFC chips. You can add your own logos or icons (Wi-Fi symbol, social media logo, etc.), or use the built-in QR generator to put a backup code directly on the surface of the print.
Main Features
- Versatile shapes – Cards, dots, or keychains with adjustable height, bevels, rounded corners, and optional magnet slots.
- SVG support – Import any SVG logo and turn it into an object on your housing, with the option to inset designs for flush multi-color prints.
- QR fallback – Generate QR codes for links, vCards, Wi-Fi details, or plain text and place them like any other logo.
- Magnet slots – Choose between hexagonal or circular cutouts, set width/height, and let the tool auto-adjust the housing height.
- NFC optional – Disable the NFC cutout to create solid cards or keychains without cavities.
Quickstart
- Install and enable the add-on.
- Open the NFC Cards tab in the N-panel (press N in the 3D Viewport).
- Click Prep Scene to generate the base card and clear any interfering objects.
- Choose shape, dimensions, and optional NFC or magnet cutouts.
- Import an SVG logo or generate a QR code, adjusting scale and offsets as needed.
- Export your customized housing as an STL ready for printing.
Multi-Color Printing & NFC Slot Setup in Orca Slicer
- Import the STL into Orca.
- Right click the object > Split > to Parts (not to Objects).
- In the left panel, open the Objects tab (next to Process). You’ll see a list of numbered objects.
- Right click object 2 > Change Type > set to Negative Object.
- For objects 3 and up, right click > Change Filament Type > assign your second color.
- Optional: If the design is inset, flip the STL 180° for a cleaner top surface.
- Slice and scrub the slider to the layer just before the NFC cavity gets covered. Right click > Add Pause.
- Re-slice and save/send g-code to your printer.
Requirements & Installation
You need:
* Blender 4.2.0 or later
Manual install:
Download nfcCardGen.zip.
Drag and drop it into Blender, then enable the extension.
Or go to Edit > Preferences > Add-ons > Install from Disk*, select the zip, and enable it.
License
GNU GENERAL PUBLIC LICENSE Version 3, 29 June 2007
Support & Feedback
For questions, issues, or feature requests, please open an issue in the project repository or contact me at jack@clonecore.net.
Added
3MF export with per-face material colours for multi-colour slicing in Orca Slicer / BambuStudio / PrusaSlicer Automatic detection of the ThreeMF-io extension (soft dependency — 3MF option only shown when installed) Export format toggle in the UI (3MF / STL) with info text explaining 3MF benefits Boolean solver choice (Exact / Fast) for design boolean operations in the UI Diagnostic error reporting for SVG-to-mesh pipeline failures (logo placer node group, design input node, assignment errors)Fixed
NFC cavity choice modifier sync error on file reload ("Could not sync 1 modifier values: NFC_CAVITY_CHOICE") QR mode toggle not resetting the design flag when switching between QR and SVG modes ROUNDED QR module style rendering incorrectly SVG import now extrudes each path individually before joining, producing correct geometry for multi-path designs Boolean self-union applied to imported SVG meshes to resolve overlapping shell issues QR code mesh Z-origin now centred for proper card placementChanged
QR code generation rewritten to use direct BMesh construction instead of SVG intermediary SVG import pipeline dramatically faster — per-path extrusion and manifold-making now completes most tested designs in under a second Modifier-to-property sync rewritten with dictionary-based enum conversion for robustness